 I have of late much appreciated free patterns and tutorials. So here is another one I came up with that I will share. Anyone is welcome to use it for personal and non commercial use. (you can make it for you, or as a gift, just DON'T sell them) I retain all commercial rights to it. The point is to hold all your diapers and changing stuff in your diaper bag together, so you can just grab a small bundle to change your kid, instead of lugging the whole bag around to the bathroom. Obviously I like the idea, or I wouldn't have designed this one. Enjoy it. Its fun to customize to match with other baby accessories.
DISCLAIMER! I used pictures of two different diaper holders in the directions, so sorry if that is confusing. It is also really hard to explain how to do things with only pictures and words... instead of just doing it, or showing someone how in person. I didn't think this was complicated at all until I wrote directions for it. If you ARE confused, please ask me questions, and I'll try to make the directions better and clear it up.
Supplies:
-rotary cutter, self healing mat and clear ruler (or scissors and measuring tape)
-sewing machine.-two coordinating/contrasting fabrics, 1/3 of a yard each
-matching thread
-clear vinyl, 1/4 yard.
-iron on/fusible interfacing
-10" of 1/4" wide elastic
-sew on Velcro
-8 1/2" x 4 1/2" x 1" diaper wipes traveling case (Huggies.. is the one I used)
optional:
-coordinating 1" wide grosgrain ribbon
-more coordinating fabric scraps for pockets.
-tissue paper for sewing vinyl easier
-clothespins for holding vinyl in place
Cut:
-one 10 1/2" x 20 1/2" rectangle of the main/outer fabric
-one 10 1/2" x 20 1/2" rectangle of the liner/contrast fabric-one 10 1/2" x 20 1/2" rectangle of the fusible interfacing.
-one 8 1/2" x 11 3/4" rectangle of main/outer fabric or other coordinating fabric for the middle pocket
-two 5 1/2" x 10 1/2" rectangles of clear vinyl for outer pockets
-two 2" x 10 1/2" binding strips out of outside fabric or second coordinating fabrics for vinyl pocket edging
Use 1/4" seam allowance unless otherwise specified on this pattern.
We'll start with the inside.
 To make the elastic casing on the middle pocket. Turn over the lengthwise edge 1/4" and iron in place. Turn over again another 1/2" and iron again. Pin and stitch close to the fold as shown.
 thread the 10" piece of elastic through the casing with a safety pin. stitch casing closed on each end, making sure to catch the elastic in place.

 To give the pocket depth we need to add small pleats near each end. (fold the fabric over to make a little pinch) Pinch just enough pleat to match the width of the liner (sorry for the lack of exactness.. I'm not really an exact seamstress, and it doesn't really matter). Line up edges with elastic casing matching the edge of the liner fabric, pin in place. Stitch along the opposite edge of the pocket as shown in both the illustration and picture.
 Fold pocket over adding more small pleats close the the corners of each side. Pin and stitch along the sides. (if you want more guidelines as to how big to make the pleats, use the travel size diaper wipes you'll be putting in it as a guide)
 Vinyl pockets
- [1st illustration] sew (no pinning on vinyl) right sides together the binding strip to the vinyl. (tip: sew with the vinyl on the bottom, it will feed through your machine easier.)
-[2nd illustration] turn and fold fabric binding strip along the seam edge.
-[3rd and 4th illustration] Fold twice to make a binding. stitch close to the edge. (edges won't match, wider side with outer stitching is the outside). Repeat for other vinyl pocket.
 Stitch vinyl pockets to liner matching corners. (if you like to pin... use clothespins while sewing to hold it in place instead) (for easier feeding through your machine, put the vinyl on the bottom) Clip curves and trim close to stitching on vinyl only.
Inside is complete... now to construct the outside.
 Iron on fusible interfacing to the outer fabric according to interfacing directions.
 if you are using a contrasting ribbon stitch along the edges of the ribbon down the middle of length of the outer fabric.
Velcro Tab: (two ways shown)
-Cut about 7/8" hook side of velcro, and about 1 1/4" of the soft side of the velcro.
 using ribbon:
cut 3 1/2" of ribbon. Sew hook side of velcro just past the middle of the ribbon. Fold ribbon in half and stitch along the edges of the ribbon.
 or using fabric scraps:
cut two pieces of 2" x 1 1/2" contrasting fabric scrap. Sew hook side of velcro onto the right side of one fabric piece about a 1/2" away from the end. With right sides together sew around three sides of both fabric scraps leaving the opposite end (of the velcro) side open. Clip corners, and turn inside out. (you can stitch 1/8" around the edges for a more finished look if you'd like)
 pin velcro tab as shown to the middle of the lengthwise end (velcro side up). Pin soft side of velcro in between 5 1/2" and 6 3/4" along the ribbon (or in the middle) as shown. (To double check correct velcro position, fill liner side with diapers and wipes, pin corners together and fold up, checking velcro closure. Adjust accordingly.) sew velcro and velcro tab on.
 With right sides together, pin liner and outside pieces together (but not on the vinyl part, pins leave permanent holes in vinyl). You can hold the ends in place with clothespins if you want. Stitch with 3/8" seam allowance leaving an opening along the side, large enough to turn inside out. Clip corners paying special attention to the vinyl (very important! otherwise it will be a nightmare to turn inside out). Then trim vinyl only close to the seam.
 turn inside out. Make sure to turn the pockets to the inside, and get the corners tight.
 Pin opening closed, and stitch 1/8" seam allowance around the entire diaper holder. (paying careful attention to making sure the hole is closed and vinyl is flat)
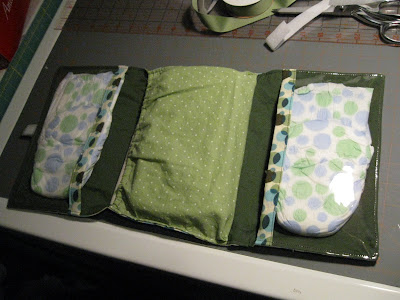 fill with diapers (it is designed to fit 3 diapers of any size, one per pocket) with wipes and changing pad in the middle. You can buy or make your own changing pad. (You just decide on the size, and cut top, and bottom fabrics and vinyl the same size and sew them together with vinyl in the middle, leaving an opening to turn inside out, and then finishing it with a topstitch just like the diaper case once it is turned inside out)
 fold it up and you're ready to go!
I'm crap at it. But seeing as it is a recognized (though not celebrated) weakness of mine, I'm always trying to come up with (or find) ideas that just might help me be not-so crap at it. Occasionally out of sheer volume of trial and error, I come across some things that have miraculously worked for me. I will share them with you on the off chance that perhaps they might help you too. Or you could alternately point and laugh because A- you are already an organization pro, or B- of course my silly ideas wouldn't work for you, or C- you are rich enough to pay someone to do your dirty work for you, or D- you have no children to negate your organizational prowess. At which point you have at least been amused by my misfortunes, so my rantings haven't been in vain after all.
Idea Uno.
I especially suck at cleaning my house. I just don't LIKE it, and it gets messed up again so fast, why bother cleaning it ALL of the time. So I used to let it slide until I went absolutely mad with disgust and annoyance at which point I'd go through and angrily clean the whole thing up, only to have it last roughly .00318 milliseconds before the next tornado hit. Seriously, what was the point.
Or else I was forever picking things up, but it never stayed as such long enough to vacuum or sweep before other toys, coats, backpacks or shoes would drift in of their own natural volition, thus preventing any actual cleaning of the cluttered surface. * So, even I who have a moderately high tolerance for clutter, was seriously annoyed. Next, I tried a chore chart, which didn't really last. Then I tried having everybody help clean up every Saturday. It wasted the day, and made everybody cranky. Everything I tried never really lasted longer than a couple of weeks. And took lots of effort.
* (Sir Isaac Newton, had he any progeny would have certainly discovered this fourth undeniable law of thermodynamics which is as follows "areas in clutter must remain in clutter unless acted upon by the STRONG force, which exists only in the nucleus of atoms, so good luck with getting that to work for you", but fortunately for high school students everywhere he didn't manage to fit procreation into his rather busy schedule and there is, for now, one less law to memorize.)
So... I came up with only cleaning one room a day. Every day, except weekends. That's it. Ignore the rest of the house (except the dishes.. yeah, that can't be ignored, and laundry I suppose..) and only focus on one room. Then the next day pick a different room. It actually has a chance to get all of the way clean, not just picked up, but thoroughly scrubbed (and half of the time organized) because I'm setting a realistic, small goal. And because it is realistic, easy and small, I do it again, and it actually lasts beyond a few weeks. The surprising thing is it helps me to be more productive, because once my one room is done, I don't have to do any wasting-time-avoid-cleaning-syndrome things, I get to move onto whatever project I am currently working on sans guilt. Then not only do I have a great feeling of accomplishment, but it actually stays a lot cleaner for some reason. (this part I don't get, except that as a whole, each room gets completely cleaned about once a week, which is probably more than ever did before in my house) And if happen to be feeling lazier on a certain day, I pick a room that isn't so bad. (if I have something too structured, I feel stifled, so I don't have set days for each room) Even when I miss a day, or days, I don't catch up and clean more than one a day, I just start again. I turn on music, and make my kids help me, and its not so bad. I really like it, and even if it doesn't work for you, I'm really, really relieved that something works for me. Sure it means all of your entire house isn't spotless at the same time, but when did that ever last anyway. Its scientifically proven. Nature truly does abhor a vacuum. Lucky for us, 21st century narcissistic Americans abhor Nature. So, it all evens out. Point deux.I am rotten at making real dinners consistently. Five o'clock rolls around, and I spend an hour thinking of things I don't feel like making, and then having to force it upon my unwilling subjects. By six, I am in somewhat of a panic... oh crap, now I have to do something ELSE and quick, because we should be eating now, or thereabouts. Pancakes, oatmeal, cold cereal, grilled tuna or cheese sandwiches, hot dogs, or mac and cheese are now the options. Gross. Well, except for the pancakes, which we have quite a lot of, but aren't really that great for long term hunger fulfillment. ANYWAY... as aforementioned and is now glaringly obvious at this point, I'm not organized enough to know what I'm making beforehand, which would solve all but the forcing-to-consume part of my problem. I also am a booger and can't be bothered with sticking to a fixed schedule for meals. How am I going to know on Monday what I'll feel like eating (or making) on Friday? 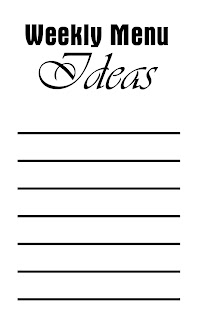 Sometimes I think of a few I want to make, and I write them down before hand, but only occasionally, but it really helps. So I should be able to write out a list of seven meals that I might wish to make through the week in no particular order, and in varying degrees of time allotment required to prepare. I make sure I have ingredients on hand, or go get them all at once... So, I thought if I had a cool specific place to write all of it, then maybe I'd be consistent at planning ahead. So instead of dinner, I made a blank menu idea list I could print more of whenever I needed to. And then I thought of a cool way to put them on my fridge... So, I thought I'd share how to make it, and perhaps it can benefit you too, so that my kids having oatmeal for dinner yet again won't be in vain. I'll even give you the finished printing layout because I'm that kind of person.
print THIS out.
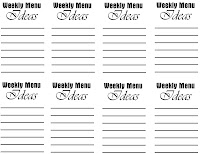
I didn't put borders on it, because my laser printer doesn't DO borderless printing, so make sure when you print it out it is with a border. And its not perfect (hey, don't look a gift horse in the mouth, I made it for you, quit whining) they're all not going to line up exactly and the edge borders are going to be bigger than the middle ones, but get over it, and just cut it off.
..and then if you went through all that bother, you might as well make the holder. (its really easy) And you can use a random ugly or boring magnet you don't care for to hold it up.
Cut a clear vinyl strip. 3 1/4" x 10 1/2"
Fold the strip of clear vinyl once backwards, and once forwards. Adjust to fit.
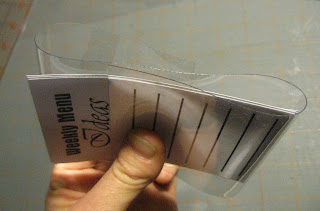
Sew the edges with cool colored thread. (I sew each seam twice so its thicker, and stays better, and you don't have to backstitch at the beginning and end because that looks silly on vinyl)
Slide the magnet under one flap.
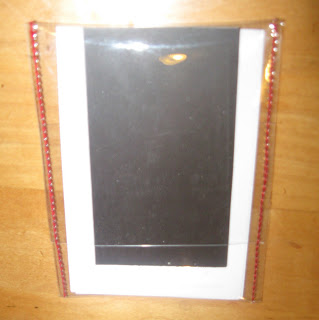
..and the blank lists into the other.
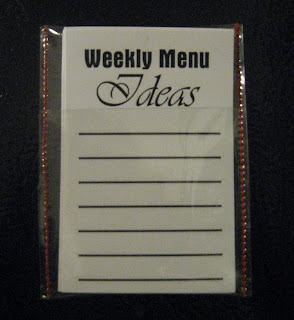 Fill with ideas. Place on fridge. Feel sufficiently motivated and inspired to make dinner before bedtime.
Figuring out how to get your picky kids to eat the dinner, without giving them therapist fodder? No clue.
(and hey, make it all you want for you and friends or family, but don't rip off my idea as your own and try to sell them or anything K, that's just rude!)
Solution drei.
ha, ha, just kidding! I don't have another one. yet. I just wanted to use another random language number, so it looked like it was on purpose. (Kinda like I'd be cool like Bono and do my own version of weird counting, and not just totally copy his 1, 2, 3, 14 in spanish.) I know I'm lame, just checking to see if anybody is still actually reading by now. You can officially stop though. I'll let you.
I promise.
here is the tutorial finally, which I realized I'd already written ages ago, but only hadn't added the pictures... silly me.
 So, I finally caved and made some headbands for my bald baby girl Lucy. I do normally get rather bored with her being mistaken for a boy, despite the bracelet she usually wears and/or pink clothing or dresses she may or not be wearing, but I am rather used to it. I had lots of practice getting used to it with my first bald baby girl Sohvi, who stayed that way until age two, at which point she started to BARELY have enough to tell it was curly.So Lucy especially needed something feminine for our HUGE family pictures (all of my parents progeny) for which she was to be dressed all in black. So, I messed around and came up with a darling headband. My sister really liked them, so I offered to make one for my cutie niece and since I was on a roll I made a bunch more for Lucy. I love them, and am amazed and delighted that she usually leaves them alone. They are incredibly easy to make even for someone who has almost no sewing skills and most others could probably copy them easily WITHOUT the instructions.. well, here they are anyway. I still prefer to follow someone else's directions anyway (and most especially their measurements).Supplies:old tee-shirts -or- cute stretchy knit fabricfake flowersbeads, or like adornments for the middle of the flowerTools:cutting mat and rotary cutter -or- scissors and measuring tape hot glue gun
sewing machine
-Plug in the glue gun, so it will be ready to use later-Cut open one of the side seams of the tee-shirt so it can lay flat. -Cut off the bottom hem of the shirt.
-Measure and cut the fabric 3" wide for a narrow headband (smaller flower) 3 1/2" for meduim, and 4" for large. I used about 16" long for one of Lucy's, she was 14 months old then, and they still fit at 22 months (she has a big head too)... it also depends on how stretchy your shirt is. Fortunately being stretchy makes being exact not matter so much. Measure your child's head and if you're using normal tee-shirt fabric add an inch. If it has lycra or spandex in it, don't add anything.
 -fold lengthwise with the right sides together
 - stitch with a zigzag seam with a 1/4" seam allowance. (or serge it, if you are lucky enough to have one)
 -turn right side out. You can press it if you are the kind of person who uses an iron while you sew, but its knit so you don't need to.
 -fold in half
 -sew the ends together with a straight stitch and a 1/2" seam allowance.
 - open up the seam in the middle.
 -over stitch the ends of the seam so they lay flat.-trim off excess material.
Head band is done if you don't want to embellish it with a flower (like if you had cute material to start with)
Adding decorations: (you can also add a loop around the band and add flowers to clips and have the decoration be interchangeable, but for kids the more parts there are that come off, usually do)
-take apart your fake flowers (pull apart all the plastic stuff) so you only have the fabric 'petal' part. I usually use more than one set of petals even if they weren't meant to be that way, it gives the flowers more depth and they look fuller and therefore nicer. -glue each set of 'petals' separately to the middle of the headband. (that way you can wear it on either side of baby's face)
-glue on the middle embellishment, bead, crystal, middle of the fake flower (cut off whatever you need to, to make it glue on flat) whatever.
-put it on your darling bald little baby girl and hope she leaves it on. You're done... see, its really easy! And pretty dang cheap!


Sohvi and Max really wanted to cut out heart decorations for Valentine's Day, and finding myself with no good reason not to, I agreed to attempt it. So, I taught Sohvi how to cut out symetrical hearts by folding the paper down the middle, and Max mostly watched and requested asymmetrical hearts, shredded other paper and helped hang them up on the window. While I withstood the temptation to offer placement advice to my kids, and/or hang them all myself instead. That is how much I love my kids, I can stand back and let them make an unbalanced, lopsided, yet lovely splay on my windows all by themselves. I however busied myself making valentine heart snowflakes out of colored paper and abstract valentine art, so I could contribute something.
 That was really fun. So it was a good mix of eclectic kid hearts as well as my crazy overboard detailed snowflakes. (which is why I don't usually do decorations.. I spend too much time on them, only to throw them away later, because they've been destroyed, and/or I don't want the bother of saving them and pulling them out for every separate occasion). The heart snowflakes do have really good potential for kid combined with adult projects.
 They do the art (theoretically, because by the time I thought of it, Sohvi didn't want to do abstract, and Max's attention span had expired on the whole project). So you (being the adult) cut out the snowflake from the dried art (or your kids if they are old enough to cut their own snowflakes). Sohvi probably could, but was content with cutting plain hearts. So I had to provide the abstract art AND the cutting.
You can do any kind of medium, but white crayon makes for cool wax resist effects if you watercolor on top of it. (which I didn't do, I did red, which I obviously like the effect of as well)
 Watercolor is funner for me with abstract, so I did a combination of crayon and watercolor in valentine colors. I also messed around with a tiny hole punch in the snowflakes. It was totally fun, and I made myself stop at four, so I didn't overpower (supposedly) my kids hearts. I like the compliment of both of them together on the window. Try it out!
 I have of late much appreciated free patterns and tutorials. So here is another one I came up with that I will share. Anyone is welcome to use it for personal and non commercial use. (you can make it for you, or as a gift, just DON'T sell them) I retain all commercial rights to it. The point is to hold all your diapers and changing stuff in your diaper bag together, so you can just grab a small bundle to change your kid, instead of lugging the whole bag around to the bathroom. Obviously I like the idea, or I wouldn't have designed this one. Enjoy it. Its fun to customize to match with other baby accessories.
 To make the elastic casing on the middle pocket. Turn over the lengthwise edge 1/4" and iron in place. Turn over again another 1/2" and iron again. Pin and stitch close to the fold as shown.
 thread the 10" piece of elastic through the casing with a safety pin. stitch casing closed on each end, making sure to catch the elastic in place.
 To give the pocket depth we need to add small pleats near each end. (fold the fabric over to make a little pinch) Pinch just enough pleat to match the width of the liner (sorry for the lack of exactness.. I'm not really an exact seamstress, and it doesn't really matter). Line up edges with elastic casing matching the edge of the liner fabric, pin in place. Stitch along the opposite edge of the pocket as shown in both the illustration and picture.
 Vinyl pockets
 Stitch vinyl pockets to liner matching corners. (if you like to pin... use clothespins while sewing to hold it in place instead) (for easier feeding through your machine, put the vinyl on the bottom) Clip curves and trim close to stitching on vinyl only.
  Iron on fusible interfacing to the outer fabric according to interfacing directions.
 if you are using a contrasting ribbon stitch along the edges of the ribbon down the middle of length of the outer fabric.
 using ribbon:
 or using fabric scraps:
 With right sides together, pin liner and outside pieces together (but not on the vinyl part, pins leave permanent holes in vinyl). You can hold the ends in place with clothespins if you want. Stitch with 3/8" seam allowance leaving an opening along the side, large enough to turn inside out. Clip corners paying special attention to the vinyl (very important! otherwise it will be a nightmare to turn inside out). Then trim vinyl only close to the seam.
 turn inside out. Make sure to turn the pockets to the inside, and get the corners tight.
 Pin opening closed, and stitch 1/8" seam allowance around the entire diaper holder. (paying careful attention to making sure the hole is closed and vinyl is flat)
 fill with diapers (it is designed to fit 3 diapers of any size, one per pocket) with wipes and changing pad in the middle. You can buy or make your own changing pad. (You just decide on the size, and cut top, and bottom fabrics and vinyl the same size and sew them together with vinyl in the middle, leaving an opening to turn inside out, and then finishing it with a topstitch just like the diaper case once it is turned inside out)
 fold it up and you're ready to go!


